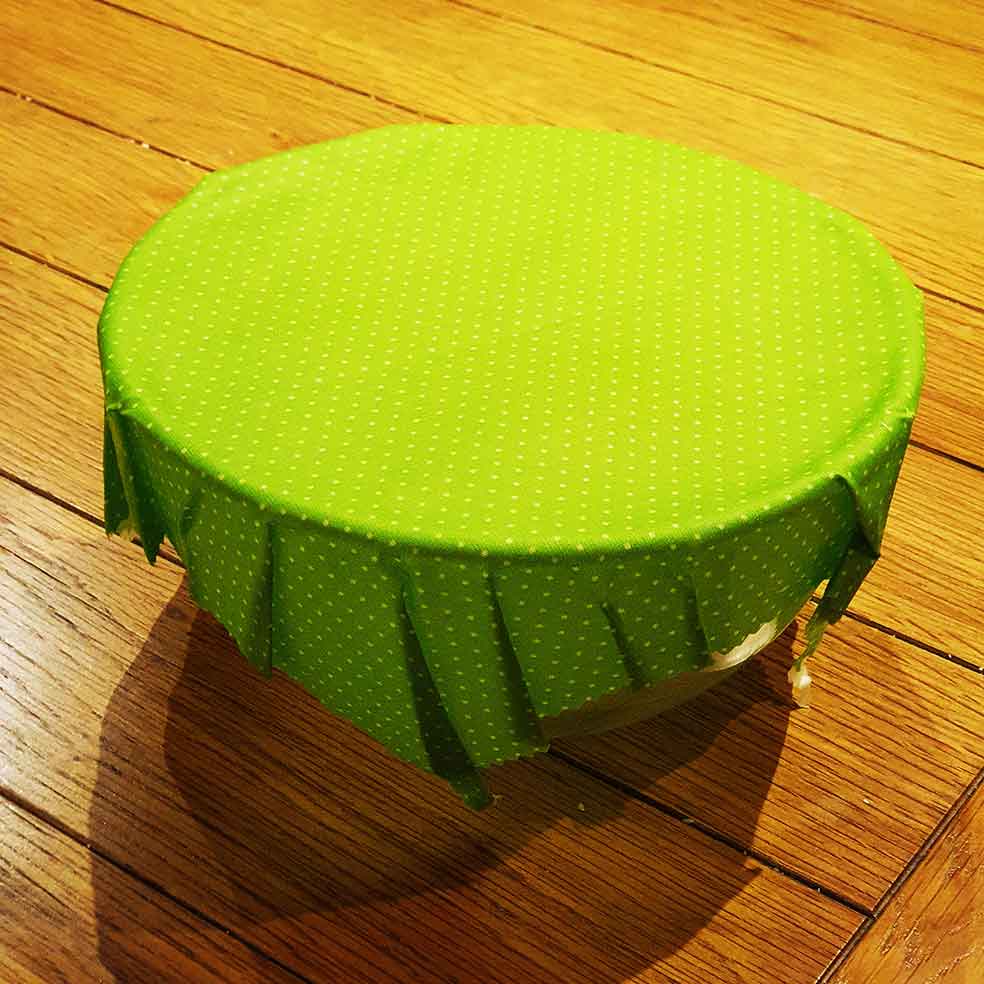
How to make a beeswax food wrap
Beeswax wraps are a great environmentally-friendly alternative to cling film, plastic sandwich bags and even foil. Reusable food wrap is a more sustainable option, preventing toxic plastics from having to be produced. It’s also a great way to save money. Here’s how you can make them yourself at home.
What you will need
- Beeswax pellets (no more than 20g)
- Cotton fabric (20cm x 20cm)
- Parchment / baking paper
- Iron
- Tea towel
Follow the instructions below, or you can download our factsheet Make your own beeswax food wraps or watch the video!
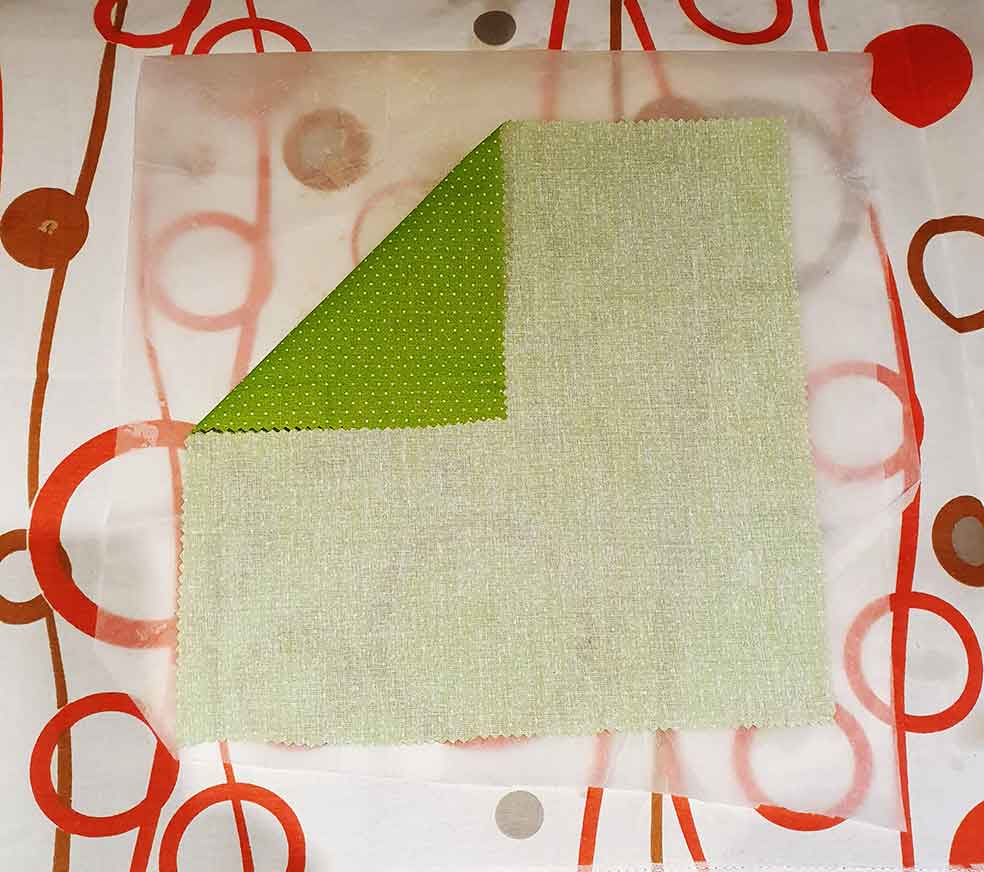
Step 1 - Prepare your fabric
Lay a sheet of parchment paper on your work surface and
your fabric (wrong side up) on top of that. Make sure you
have a couple of inches of parchment outside the edge
of the fabric.
TOP TIP!
It’s important to cover your ironing board with a thick tea
towel or board as well as using the parchment paper,
to catch any wax run-off. Use the beeswax sparingly
as it is easier to add more pellets than it is to wipe up the
mess if needed, so don’t get too carried away!
Step 2 - Layer your parchment paper
Lay another sheet of parchment paper on top of the fabric
- again, making sure you have a good margin covered
outside the fabric. The parchment paper protects your
work surface and iron from wax runoff.
Step 3 - Gently iron your wrap!
With your iron set to a medium heat and no steam, gently
iron your wrap.
You will see the parchment paper becoming translucent
where the wax melts into the fabric. Slow firm movements
with your iron will help to spread the wax.
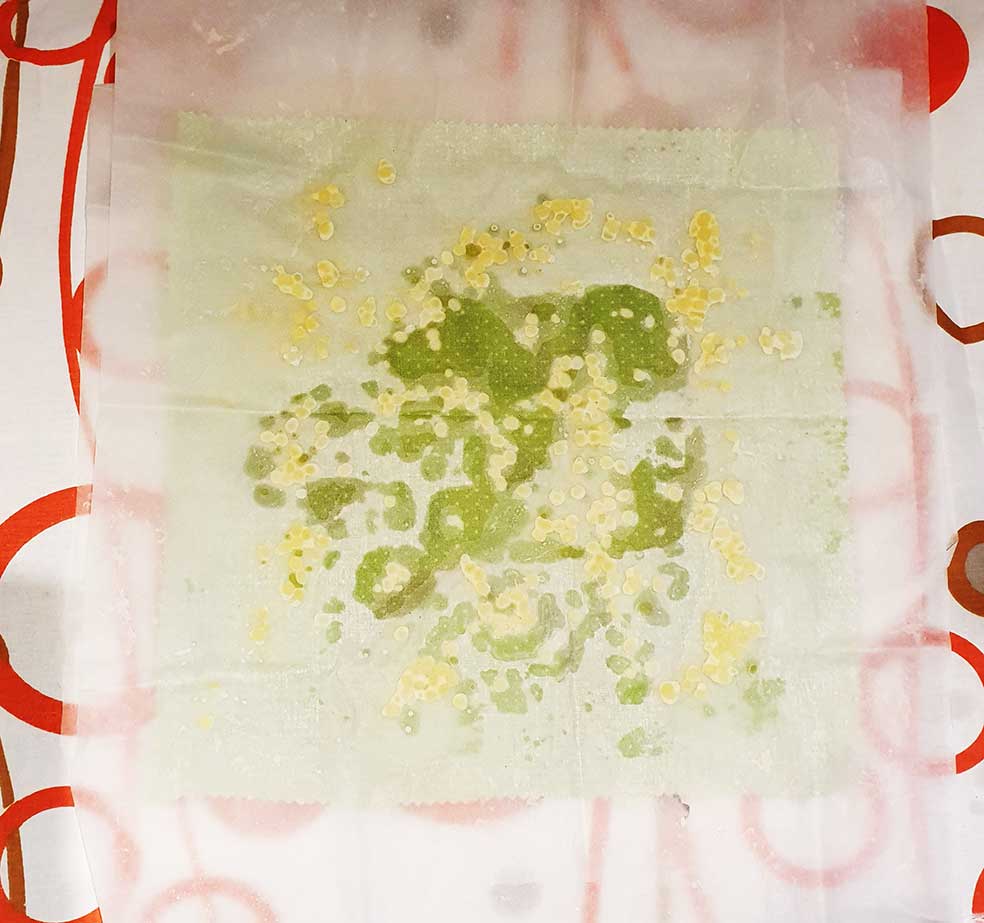
Step 4 - Check & add more wax if needed
Lift the top sheet of parchment to check your progress. It’s easy
to see where not enough wax has been used.
Add a few more beeswax pellets to areas that need a top-up, cover with the top parchment sheet again (making sure you keep the wax-free side to the iron), and re-iron.
Step 5 - Make sure it's translucent
When the parchment paper is translucent right across the wrap fabric and out to all the edges (like the picture opposite) you're good to go!
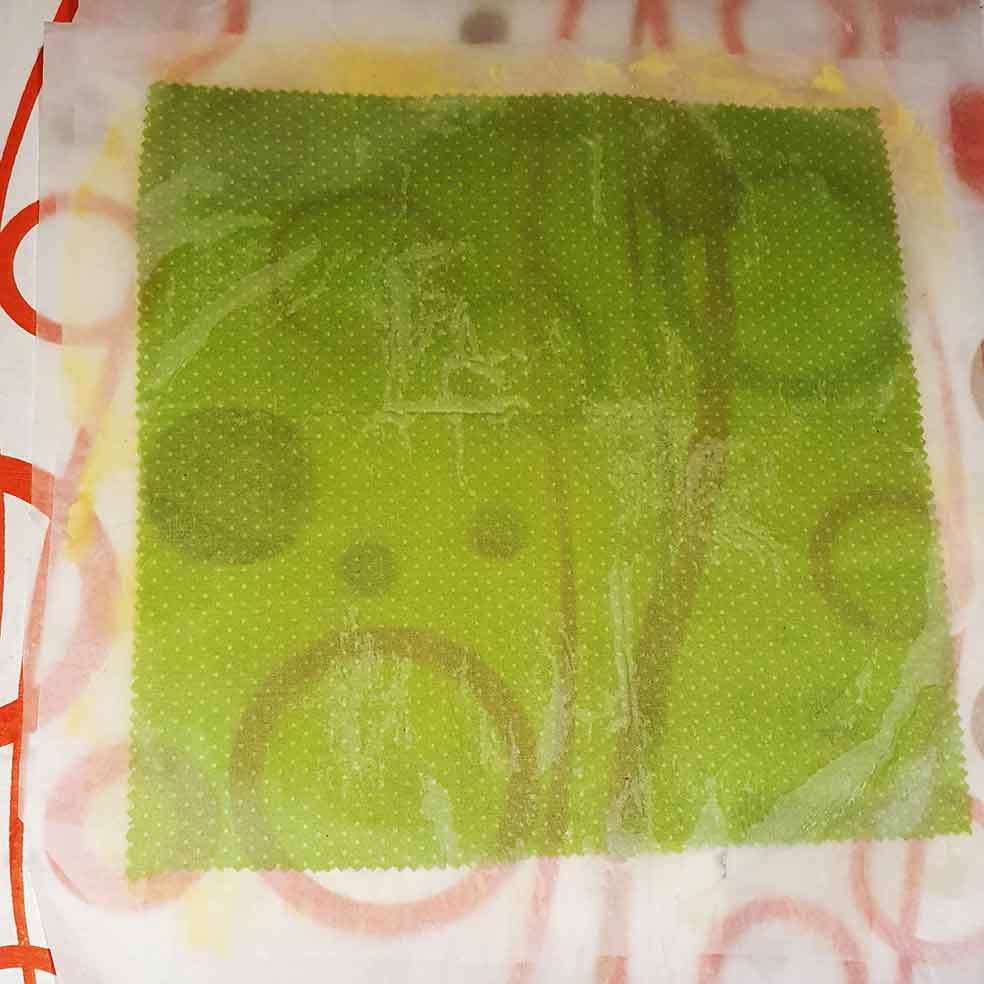
Step 6 - Lift the parchment paper
Lift the parchment paper, and quickly lift your wrap by the corners before it cools to stop it sticking to the parchment. Don’t worry if it does stick - just cover up with parchment paper again, run your iron over to warm the wax, and lift away while still warm.
Think you’ve used too much wax? Easy - just add another piece of fabric, and iron the two together - the new fabric will take up the extra wax.
Step 7 - Dry your wrap
The wax will cool almost instantly when you pick up the wrap, so just wave it about for a couple of seconds and then lay it aside and carry on with the next one. You can hang it on a clothes rack to set if you wish.
You can carry on using the same parchment paper many times, and leftover wax from the previous wrap will just be taken up by the next piece of fabric.
Step 8 - Caring for your reusable beeswax wrap
- After use, wash your food wrap with cool water and mild dish soap.
- Avoid using hot water so the wax doesn’t melt.
- Allow to air dry on a dish rack. Smooth flat with your hands and store.
- Avoid using the wraps to wrap raw meat & fish for food safety reasons.
TOP TIP
Some parchment/baking papers (depending on the heat of your iron) may leave a bit of waxy residue on your iron, which of course you don’t want to end up on the next clothing item you iron. Clean your iron while it is still warm and the residue soft by ironing a piece of scrap fabric or an old towel and turning your steam setting to full while ironing to make sure you clear the steam vents of any residue.